Tuesday, June 5, 2012

Sweet Spiked Smoothie

So, there is a reason I have been slacking on my posts, I pinkie promise...

I am moving! Well in the process..

Now, everyone has moved at some point in their lives (this being my 6th time) but everyone know what a pain in the you know what it is.  I think I have gotten a better workout moving around boxes, unpacking boxes, and walking up an insane amount of staircases than I have ever gotten at my gym.  I'm serious, moving is work.

Hard work.

Anyways, I have been living off of take-out for the past week because I obviously have no time for cooking and if I never saw another take-out menu again, my life would be absolutely A-okay.

I finally decided since I was spending my summer moving my life out of boxes and not laying out in the sun on a beach somewhere tropical, I deserved something tasty and delicious.

This sweet "spiked" smoothie is taaaasty.  It makes this stressful experience actually relaxing.

But that may just be the rum talking...

Anyways, regardless if you are moving or not, make this.  I promise, it will make your evening feel like you are on a tropical island in paradise... even if you are not like me.  (Whom is in the complete opposite of paradise as I stare at the 1000 boxes waiting to be unpacked.)

Oh well, at least I have this drink.


Ingredients: 
10 strawberries, hulled and chopped
3/4 cup watermelon, seedless and chopped
2 nectarines, seeded, skin removed, and chopped
1/2 cup light cran-raspberry juice
9 oz Malibu rum (you can add as much or as little or you want- or make 'em virgin!)
2 cups, ice

Directions:
Chop all fruits and add to blender.


Add juice, alcohol, and ice.


Blend on high or "smoothie" control depending on blender until thick.  You may need to add more ice and in that case, pour some drink out in a cup and add more ice.  Blend again.  Pour and garnish with fruit!


Wednesday, May 23, 2012

Balsamic Mozzarella and Fresh Summer Salad

It is FINALLY my favorite season.

Bachelor season.

Now ladies, you all know what I am talking about.  Nothing is better than getting together with your girlfriends, drinking some wine and eating super yummy apps.  Oh, and making commentary every other 5 seconds on the crazy girls, the obnoxious boys, and the awkward, serious stares out into the field that ABC makes the Bachelor/Bachelorette do while introducing them.

C'mon you all know you can relate.

Anyways, the new season of the Bachelorette just began and my girlfriends and I have already started our "Bachelor nights".  Last Monday, my girlfriend made this super amazing salad and I just had to put it on my blog.  It is so so so good, light and refreshing. It is the perfect thing to eat along side any meal or even as your meal.  It is sweet from the strawberries, crunchy from the cucumber, and is bright and full of color.  Oh, and the fresh mozzarella on top is TO DIE FOR.  I promise this salad will be a hit at your next dinner party, we couldn't stop talking about it and we even made it for dinner the next day.  Everyone will LOVE it.

So, there ya have it. Now you have the perfect excuse to make this crispy summer salad.  Next Monday night, right before you are about to watch Emily take on her pretty boys, make sure this gorgeous salad is on your plate!


Ingredients:


1 container soft mozzarella in water, drained and cubed
1 TBS fresh basil, chopped
1 package favorite Italian season dressing
Balsamic vinegar

1 box Spring salad mix (I used 3/4 of the box, you could also do 2 bags of salad mix)
10 romaine leaves, chopped
1 English cucumber, halved and sliced
1 container mini yellow cherry heirloom tomatoes, halved
1 container red cherry tomatoes, halved
1 bag sugar snap peas, trimmed
1 container strawberries, thinly sliced
Your favorite dressing (we ate a sweet basil dressing with this but Italian dressing would be great too!)

Directions:
A couple hours before you make the salad, take out mozzarella and chop into small pieces.  Put in small bowl.  Chop 1-2 TBS of basil and mix in bowl with cheese.  Make Italian dressing according to package- except when it calls for red wine vinegar, use balsamic vinegar instead.  Pour over mozzarella and basil.  Mix to combine and refrigerate until ready to serve so the dressing marinates the cheese.


When ready to serve salad, rinse Spring salad mix and romaine leaves.  Pat dry and put in large serving bowl.


Wash and cut veggies and fruit according to instructions above.


Add to salad as show in first picture.

When ready to serve, take out bowl of mozzarella marinating in dressing and put along side the salad, so people can plop a few (or a lot) of pieces on top of their salads.  Pour over your favorite dressing and wah-lah!  The perfect salad! Now go turn on ABC and watch the battle for the rose begin!


Thursday, May 17, 2012

Caprese Bruschetta

Who doesn't love a Caprese salad?  You know, with juicy tomatoes, fresh basil, soft mozzarella, and tangy balsamic vinegar.  Well I know that I LOVE LOVE LOVE it but I also love bread and bruschetta.  Of course, whenever I cook an Italian meal, I always want all three of those delicious appetizers before the main meal.  The only problem is, I would stuff my face with all of the addicting apps before me and end up becoming way too full before the main dish even came out of the oven.  I really wanted to fix this problem and somehow get all of the fresh appetizers in one bite without getting too full before my pasta came out of the over.. and then one day, it came to me.

Caprese Bruschetta.

Caprese salad. Bread. Bruschetta.  I get all three in one small bite... brilliant.

This bruschetta is honestly one of the best.  Even my little brother who hates, and I mean HATES, tomatoes eats this bruschetta by the dozen.  He once told me it beat out all restaurant bruschetta- and I must say, I have to agree.  I promise the second you bite into this little toast of delicousness, you will be making sure it is on your menu every time you cook an Italian meal.

So go be amazed and whip up some of this stuff. GOOD stuff. You will be amazed... and addicted. :)  Oh, and one more thing- make sure you make this earlier in the day, before you want to serve it.  The tomatoes need to sit in the vinegar in order for it to be delish! You can even make it the evening before!


Ingredients:
10 plum tomatoes, seeded and diced
1/3 cup chopped basil
Balsamic vinegar, to coat tomatoes
1/2 tsp kosher salt
1/8 tsp freshly ground pepper
1 French baguette (I usually get the take n' bake kind)
1 ball fresh mozzarella
3 garlic cloves, minced
1/4 cup extra virgin olive oil

Directions: 
Chop tomatoes in half and scoop out seeds with a spoon.  Throw away seeds.


Chop tomatoes, depending on how chunky you want your bruschetta, and place in large bowl.


Chop fresh basil leaves and add to bowl.


Mix together.  Sprinkle in salt and pepper and combine.  Pour balsamic vinegar over the tomatoes, making sure the majority of the tomatoes are submerged in vinegar.  Stir.


Cover and refrigerate until ready to serve.

When ready to serve, take out French baguette.  Bake accordingly to package if you bought the take n' bake kind.  Slice bread into thin slices.


Lay out bread slices on a cookie sheet.  In a small bowl, add extra virgin olive oil and chopped garlic.  Microwave for one minute.


Brush garlic infused EVOO on bread, make sure you get pieces of garlic on each slice of bread!


Thinly slice mozzarella cheese, you probably won't use the whole ball- but feel free to :)


Place mozzarella cheese evenly on top of olive oil-brushed slices of bread.


Place cookie sheet in oven and turn broiler on High.  Watch carefully and let cheese melt and the bread toast. (It is okay if the bread slightly burns! You want this cheese melted!)


Take toasts out and set aside.  Take tomato mixture out of refrigerator and stir.  Take a warm toast and top with as much tomato mixture as you'd like!  (The vinegar can make the toast soggy so sometimes I pile up the tomatoes on the side of the toast and then pile on as I eat!  Do NOT drain the tomatoes from the vinegar when you are ready to serve, believe me, you want that delicious vinegar, use the bread to sop it all up!)


Tuesday, May 15, 2012

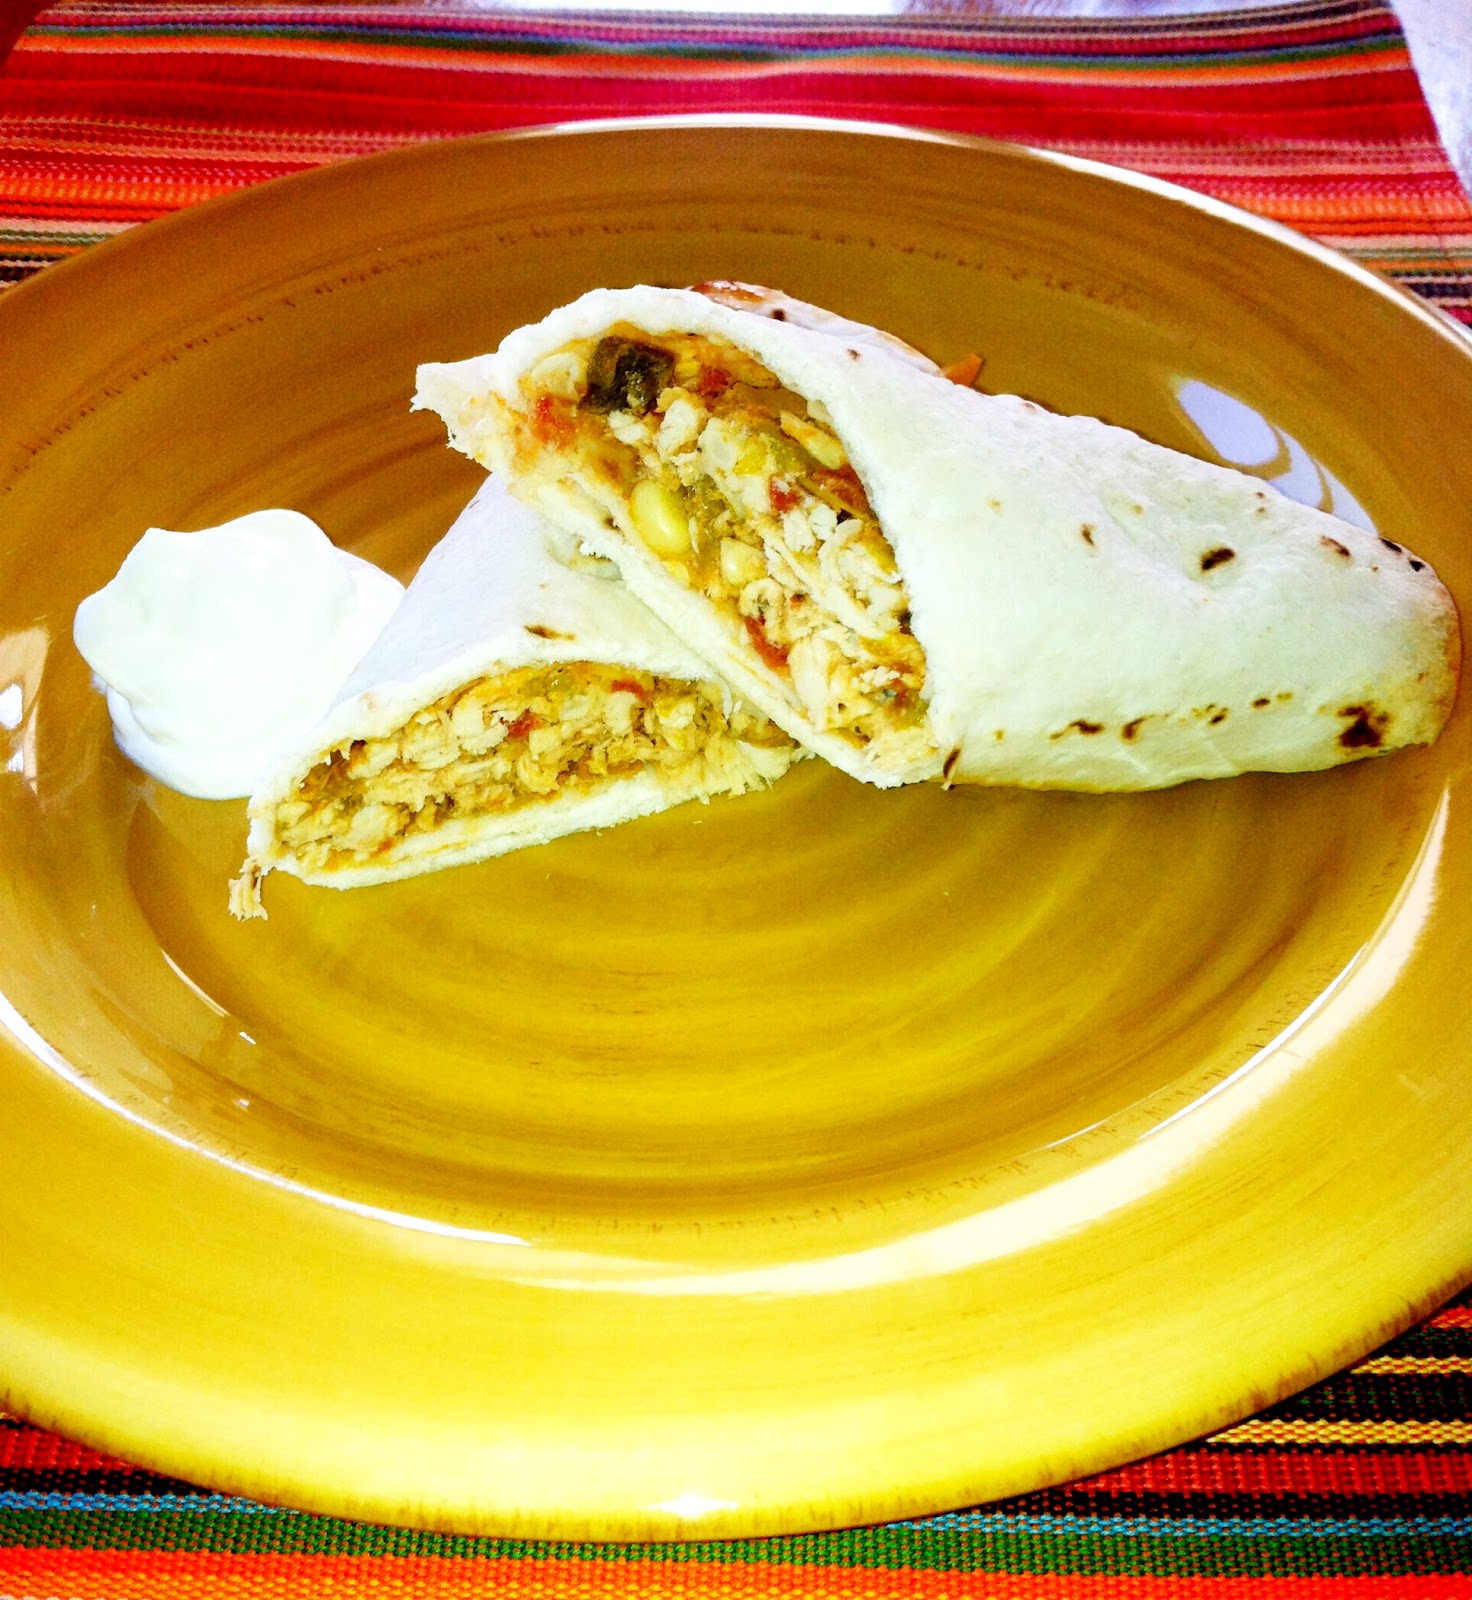
Baked Chicken "FAT" Taquitos

Holy guacamole.

Literally.

I made these chicken "fat" taquitos for the first time tonight and I am not going to lie, I was a little worried that they wouldn't turn out... Oh, but did they turn out.  They were SO good, it is not even funny.  The tortillas crisp up in the oven so perfectly and the filling is so cheesey, creamy, ooey and gooey, it will leave you just wanting more.

I know I call these "fat" taquitos, but the "fat" is purely for the size of them.  They are probably three times the size of the normal taquito, but health-wise, these babies are nothing but full of healthy ingredients.  Because they are baked and full of healthy ingredients, you don't feel as bad reaching for another... and another. :)


Ingredients:
2 chicken breasts, poached and shredded
Large box chicken broth
3 8-oz cans diced green chiles
3 ears corn, husked and shucked 
1 yellow onion, diced
1 16-oz can your favorite medium salsa
4 TBS low fat sour cream
1 8-oz bag Mexican cheese blend
Kosher salt and pepper, to taste
Extra virgin olive oil
1 package your favorite low fat tortillas

For dipping sauce:
Black bean and corn salsa (we love Archer Farm's brand from Target)
2 packages of Wholly Guacamole
1 bag favorite tortilla chips (we love La Favorita brand- they are low fat!)

Directions:
In a large pan, place chicken breasts in single layer on bottom of pan.  Cover with enough chicken stock to fully submerge the breasts.  Bring broth to a boil, then simmer for 25 minutes or until easy to shred.  


Take chicken out of broth and shred.  Set aside.  Preheat oven to 375 degrees F.  Chop onion and shuck corn, keeping kernels.  In a large saute pan, drizzle 2 tsp EVOO and turn on medium heat.  Add onion, corn, and green chiles.  Saute for 7 minutes and stir consistently.  Turn off heat. 


Add salt and pepper to taste.  Add chicken, salsa, sour cream, and cheese to onion mixture.  Stir to combine.


Lay a piece of parchment paper down on a cookie sheet and take out your tortillas.  Take a tortilla and evenly lay about 1/2 cup of the filling down the middle of the tortilla.


Tightly roll tortilla up, like a taquito, and place seam-side down on the parchment paper.  Repeat until cookie sheet is full.  You will probably need two cookie sheets.


Put taquitos in oven and bake for 25 minutes or until brown and crispy.  While taquitos are cooking, combine 2 packets of your favorite guacamole and 1 jar of your favorite salsa for dipping.  (My favorites are La Favorita Chips, Archer Farms Corn and Black Bean Salsa, and Wholly Guacamole!!)


Tuesday, May 8, 2012

Zucchini & Sweet Onion Summer Side Dish

Okay so this may sound a little strange but I promise, it is DELICIOUS.  This little warm zucchini summer salad is so easy to make- using only three ingredients- and it is the perfect thing to eat along side any of your favorite dinners.


Ingredients:
4 zucchini, thinly sliced (it may seem like a lot but it dwindles down into basically nothing in the saute pan)
3 yellow squash, thinly sliced
2 sweet onions, sliced
Extra virgin olive oil
Kosher salt, to taste
Freshly ground pepper, to taste

Directions:
Thinly slice zucchini and summer squash into small medallions.


Thinly slice onions.


In a saute pan drizzle a small amount of EVOO and turn on medium heat.  Add zucchini, squash, and onions.  Sprinkle a pinch of salt and pepper over the veggies.  Stir consistently, making sure every piece gets caramelized!


It takes 20-30 minutes for this to cook and caramelize all the way through.  It seems like a lot but like I said, it dwindles down while cooking!  When it is done, it should look like this!


Monday, May 7, 2012

Parmesan Crusted Tilapia

Can anyone tell me where the sun has gone?  It has been raining since I woke up and I don't think it is going to be stopping anytime soon.  It is just one of those days where the gloom has taken away all motivation and is making me want to do nothing more than sit my butt on my big comfy couch and not move all day long.

Oh, and eat a deliciously warm meal.

Now this fish is probably one of the easiest meals to make for dinner so I can't help but put it on top of my "lazy day" dinner list.  Perfect for tonight.  

Not only is it super quick, allowing myself to still technically be lazy, but it is SO yummy.  The Parmesan cheese and breadcrumbs create a salty, crunchy crust around the steaming hot, moist tilapia- I am tellin ya, it is the perfect meal to warm anyone up on cold days like today.  

It is satisfying, yet light, which makes me feel even better about sitting around, doing absolutely nothing all day long. 


Ingredients:
4 tilapia fillets
1 1/2 cup flour
Kosher salt
Freshly ground pepper
3 egg whites, whipped
1 cup breadcrumbs (I prefer Panko!)
1 cup Parmesan cheese, shredded
Extra virgin olive oil

Directions:
Preheat oven to 450 degrees F.  Take out three separate bowls to dredge the fish.  In the first bowl add flour, salt, and pepper and mix.  In the second bowl add the egg whites and whip with a fork, making eggs frothy.  In the third bowl, add breadcrumbs and Parmesan cheese, mix.  Place a cookie cooling rack on top of a cookie sheet covered in tin foil at the end of the dredging station.  Spray cookie rack with non-stick cooking spray.


Take a tilapia fillet and cover in flour mixture.  Coat and shake off excess flour.


Next, place fillet in egg white mixture and dredge.  Finally put the fillet in the cheese and breadcrumb mixture and coat.  Place on cooling rack.


Repeat with rest of fillets.  Drizzle extra virgin olive oil on top of fish fillets so it breadcrumbs become crunchy in the oven.


Bake for 20 minutes, then turn broiler on high and broil until golden and crispy! Enjoy!


Friday, May 4, 2012

The Best Ever Grilled Shrimp

I know I have been putting up a lot of grilling posts lately, but can you blame me?  Summer is FINALLY here and I am taking full advantage of it.

This shrimp recipe comes from a family friend, who actually was a huge inspiration for my love of cooking.  She is a mother of four crazy boys, so you know that her food has to be top notch in order to feed four always hungry, growing boys.  She made this shrimp for us when we were in town visiting a few summers ago and everyone went NUTS.  I am pretty sure it was gone within the first five minutes.

This shrimp is meant to be made in batches, but beware, you can't grill it fast enough.


Ingredients:
2 lbs shrimp, deveined, with or without tails- your choice!
1 cup extra virgin olive oil
1/4 cup fresh flat-leaf parsley, chopped
3 cloves garlic, minced
1 lemon, juiced
1 TBS tomato paste
2 TBS hot sauce
1 tsp dried oregano
1 tsp kosher salt
1 tsp freshly ground pepper

Directions:
Clean and devein shrimp and place in a large bowl.  Set aside.


In a smaller bowl combine all of the ingredients to make the marinade.  Whisk together.


Pour marinade over shrimp and gently mix, making sure every piece of shrimp is coated with marinade.


Cover and refrigerate for at least 2 hours.

When ready to eat, turn grill on to high.  In a grill pan, place shrimp in single layer.  (You can also skewer the shrimp and place directly on grill if you do not have a grill pan).


Cook for about 5 minutes on each side, or until shrimp is done to your liking.  (We like ours a little extra-crispy!)