Showing posts with label Side Dish. Show all posts

Sunday, February 24, 2013

Caramelized Carrots and Pearl Onions

Caramelization.  You know, that delicious, golden brown, ooey gooeyness that happens when natural sugars are brought out of whatever food you are cooking?

Yeah... you know exactly what I am talking about...

And all I can say is that you are in luck because this dish has caramelization occur everywhere.

First, the veggies caramelize in the oven, getting toasty brown and scrumptious.

Then, once you pour a sweet honey-balsamic dressing on top of them, it glazes over even more in the oven, creating a lot more caramelization goodness.

Amazing, right?  I swear, this dish is honestly like eating candy rather than vegetables... it's a great thing.

So wipe your mouth from all of that drool and go make this dish right now!! You won't be sorry.


Ingredients:
1 bag baby carrots, quartered lengthwise
About 10 pearl onions, if small keep whole, if large cut in halves

Kosher salt, about 1/2 tsp
Freshly ground pepper about 1/2 tsp
Extra virgin olive oil, drizzled (I used probably around 1/2- 1 TBS)

Dried thyme, 1 tsp
Garlic powder, 1 tsp
about 1/4 cup honey
about 1/4 cup balsamic vinegar

Directions:
Preheat the oven to 400 degrees F. Wash and chop veggies.  On your cutting board, salt and pepper the veggies and mix around with hands, just so every veggie is seasoned well.


Place tin foil on a cookie sheet and spray with non-stick cooking spray.  Add veggies.  Drizzle extra virgin olive oil on top of veggies.  Toss with hands to coat every single veggie.  Sprinkle dried thyme and garlic powder all over veggies.  


Place veggies in oven for 15 minutes.  While veggies are cooking mix together balsamic and honey in a bowl and set aside.  Once carrots and onions have cooked for 15 minutes, pull out of oven, toss with a spatula.


Pour the honey-balsamic glaze dressing all over the top.  Toss again with a spatula so every veggie gets tossed in a little bit of the glaze.    


Place veggies back in the oven and bake for another 15 minutes, or until the carrots and onions are cooked through and caramelized.


Monday, February 11, 2013

Baked Parmesan Garlic Brussel Sprouts

Brussel Sprouts...

You know, that vegetable you used to oh-so-swiftly swipe off of your plate onto the floor for your dog when no one was looking...

Well, let me tell you, after you try this yummy recipe, poor little Spot will not be getting anymore brussel sprouts anytime soon..

These aren't your average boring brussel sprouts that make you cringe when you see/smell them. These are cheesy, crunchy, crispy, garlicky brussel sprouts that will change your whole entire outlook on this this poor ol' veggie that just for some reason has such a bad rep.

I promise the minute you smell these babies baking away in your oven, your bias on brussel sprouts will forever change and they will be a new addition to your family dinner!


Ingredients:
15 medium- large brussel sprouts
5 garlic cloves, minced
Extra virgin olive oil, (drizzled)
4 TBS Parmesan cheese, shredded and divided
Freshly ground pepper
Kosher salt

Directions:
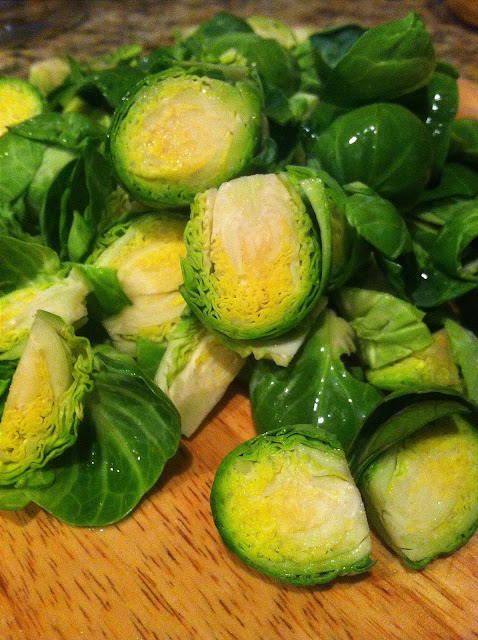
Preheat your oven to 400 degrees F.  Rinse the brussel sprouts under cold water and pat dry.  Remove the bottom each brussel sprout (the hard stem) with a sharp knife.


Cut the brussel sprouts into quarters.  


Spray a baking dish with non-stick cooking spray.  Lay the brussel sprouts evenly in the baking dish.  Mince 5 garlic cloves and sprinkle over the brussel sprouts.  Drizzle olive oil (about 1 TBS) all over the brussel sprouts.  Sprinkle 3 TBS of the Parmesan cheese all over the brussel sprouts.  Sprinkle pepper and salt all over brussel sprouts.  Mix all of the ingredients together with your hands.    


Bake the brussel sprouts in the oven for 30-40 minutes, or until the brussel sprouts are tender when poked with a fork.  Frequently, mix the brussel sprouts with a spatula so they don't burn.  When the brussel sprouts are finally tender, quickly pull them out of the oven and sprinkle the remaining TBS of Parmesan cheese all over them.  Place them back in the oven and let the Parmesan cheese melt.  Once it has melted, pull the brussel sprouts out of the oven and serve! Enjoy! :)


Saturday, January 26, 2013

Corn Salsa

Not only is this the yummiest salsa ever but it is soooo easy to make,  my dog could probably do it.

The freshest ingredients, alllll mixed together in one big bowl, and then tossed in a zesty lime dressing.

Who wouldn't want to dip a chip in that?!

It is full of gorgeous colors and flavors that will burst in your mouth the minute you take a bite. 

So, whether you throw it on your table for your big Superbowl party, or just make it for yourself as an afternoon snack, I promise it will be a hit with whoever you serve it to!


Ingredients:
2 cups frozen corn, thawed
3/4 can reduced sodium black beans, drained and rinsed
1 red bell pepper, chopped
1 small or 1/2 medium red onion, minced
1-2 avocados, chopped
2 limes, juice
2 tsp cumin
1 tsp hot sauce
1/4 tsp kosher salt
1/8 tsp freshly ground pepper

Directions:
In a large bowl combine corn, black beans, red pepper, red onion, and avocados.


Squeeze lime juice into a small bowl.  Add cumin, hot sauce, salt, and pepper to the lime juice.


 Pour over the corn mixture and combine.  Refrigerate until ready to serve.  Dip a chip in it and ENJOY!


Wednesday, July 18, 2012

Roasted Artichokes with Garlic

Garlicky.  Salty. Artichokey.

Need I say more?

This perfect side dish could not be any easier.  These little packages of yummyness take longer to eat than they actually take to make, and peeling off each leaf of salty, meaty deliciousness is nothing but fun.  This recipe literally takes 5 steps:

Clean. Chop. Stuff.  Drizzle. Sprinkle.

Pop these babies in the oven and bon appetit.  No joke, you're going to surprise yourself.   

But seriously, these will be a winner next to any dinner.


Ingredients:
3 artichokes (1 per person so use ingredients accordingly)
4 large garlic cloves, peeled and minced
12 small garlic cloves, peeled and smashed
Extra virgin olive oil 
Kosher salt

Directions:
Preheat oven to 425 degrees F.  Gently clean artichokes under cool water. 


Chop off bottom stem and 1-2 inches off the top of the artichoke.  Cutting off the bottom will allow the artichoke to stand up straight and by cutting off the top, you are allowing the leaves to really roast and get soft.  


Peel, chop, and mince 4 garlic cloves.  Set aside.  Smash and peel 6 garlic cloves.  (Smashing the garlic clove with the side of your knife will cause the garlic cloves to come easily out of the peel and it may crush into a few pieces. That is okay!)   Stuff the whole garlic cloves (or pieces of broken whole garlic cloves) into the middle leaves of the artichoke.  I gave each artichoke 4 small whole pieces of garlic.


Take the minced garlic that you set aside earlier and divide evenly among each artichoke.  You will want to stuff the tiny pieces of minced garlic into all of the leaves.  Don't forget the outer leaves!  Sprinkle some minced garlic on top of the artichoke as well.  (It may look like a lot of garlic, but believe me, it is what makes this artichoke SO good.)

Take a large piece of tin foil and drizzle extra virgin olive oil on middle of foil.  Brush/rub it in.  Place artichoke on top of oiled spot.  


Drizzle a little more extra virgin olive oil on top of artichoke and then sprinkle kosher salt over the whole artichoke.  Wrap artichoke tightly in foil to create a little ball.  Repeat with other artichokes.  Place in a deep dish baking dish and bake for 1 hour. 


After an hour is up, carefully remove tin foil and your artichoke should be browned a tad, looking oh so scrumptious!  Enjoy this tasty treat by removing each leave and using your teeth to scrap the meat off the bottom of each leaf!  Also, if you are a butter-person, chop some garlic up and put in a small bowl with a couple TBS of butter.  Microwave until butter is melted.  This will give you a garlicky-butter to dip each leaf in!


Saturday, July 7, 2012

Mini Mexican Stuffed Pepper Poppers

So you all know how obsessed I am with the Bachelor and how I get together with my girlfriends every Monday night to watch the show, drink wine, gossip, and eat some awesome, tiny bites.

This week was hometown dates, so of course, my appetizer had to be scrumptious.  These episodes are getting real and good, as my app needed to be.

After thinking long and hard about what I wanted to make-besides this awesome Fourth of July cake that I will show you at the bottom of this post, just because it was sooooo freaking cool- I finally found these little baby stuffed peppers.  I saw a bag of them at the store, and couldn't resist!  They were so tiny and cute!

I knew immediately what I was going to make- Mini Mexican Stuffed Pepper Poppers!

It's a mouthful to say... and a bite-ful to eat ;)

So next Bachelor night ('cause I know most- if not all- of you are all guilty of having Bachelor nights) I encourage you to make these little crunchy, packed poppers.  They are SO easy to make, super duper healthy, and deliver a pack of punch, full of flavor.

So try not to eat all of them, or pull the gooey-ooey cheese melted all over the top.  I dare you.

Oh, and don't be afraid to pull a Chris Harrison, and announce, "Ladies, (or gentlemen) it is the final pepper".  But believe me, you won't have to wait 2 hours for that to happen.

Ingredients:
1 package frozen corn, thawed
1 medium tomato, diced
1 large zucchini, diced
1/2 yellow onion, minced
3 cloves garlic, minced
1 bunch fresh cilantro leaves, chopped
1/2 tsp chili powder
1/2 tsp kosher salt
1/2 tsp freshly ground pepper

1 cup instant brown rice
3/4 cup black beans, drained and rinsed
1 package mini red, yellow, and orange bell peppers, seeded and halved

Low fat shredded mexican cheese
1 container low fat sour cream

Directions:
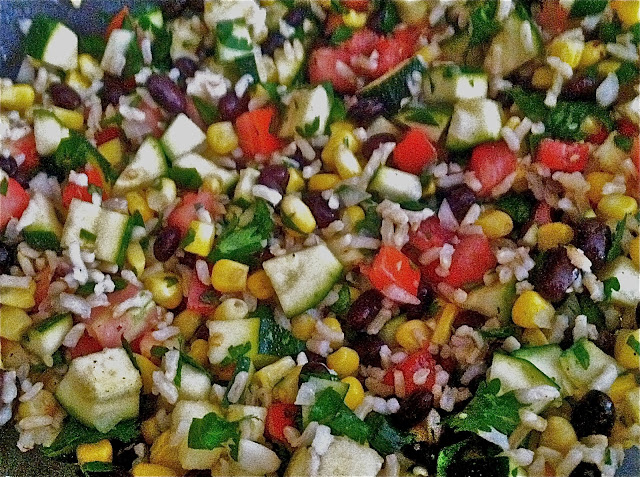
Preheat oven to 375 degrees F.  In a large bowl add corn.


Add diced tomatoes, zucchini, onion, and garlic, cilantro and spices.


Cook brown rice according to package.  Add to mixture.  Drain and rinse black beans and add to mixture.


Rinse mini bell peppers.  Seed and cut peppers in half, lengthwise.

  
Stuff the peppers with a heaping amount of the corn and rice mixture.  Place on cookie sheet.


Cover peppers with aluminum foil and bake for 35 minutes.  After 35 minutes, remove aluminum foil and top peppers with cheese.


Place back in oven for 10 minutes until cheese is melted and browned.  ENJOY!


Oh, and here is my delicious 4th of July cake that I promised to show you :)  (Inspired by www.bakingdom.com)


Wednesday, May 23, 2012

Balsamic Mozzarella and Fresh Summer Salad

It is FINALLY my favorite season.

Bachelor season.

Now ladies, you all know what I am talking about.  Nothing is better than getting together with your girlfriends, drinking some wine and eating super yummy apps.  Oh, and making commentary every other 5 seconds on the crazy girls, the obnoxious boys, and the awkward, serious stares out into the field that ABC makes the Bachelor/Bachelorette do while introducing them.

C'mon you all know you can relate.

Anyways, the new season of the Bachelorette just began and my girlfriends and I have already started our "Bachelor nights".  Last Monday, my girlfriend made this super amazing salad and I just had to put it on my blog.  It is so so so good, light and refreshing. It is the perfect thing to eat along side any meal or even as your meal.  It is sweet from the strawberries, crunchy from the cucumber, and is bright and full of color.  Oh, and the fresh mozzarella on top is TO DIE FOR.  I promise this salad will be a hit at your next dinner party, we couldn't stop talking about it and we even made it for dinner the next day.  Everyone will LOVE it.

So, there ya have it. Now you have the perfect excuse to make this crispy summer salad.  Next Monday night, right before you are about to watch Emily take on her pretty boys, make sure this gorgeous salad is on your plate!


Ingredients:


1 container soft mozzarella in water, drained and cubed
1 TBS fresh basil, chopped
1 package favorite Italian season dressing
Balsamic vinegar

1 box Spring salad mix (I used 3/4 of the box, you could also do 2 bags of salad mix)
10 romaine leaves, chopped
1 English cucumber, halved and sliced
1 container mini yellow cherry heirloom tomatoes, halved
1 container red cherry tomatoes, halved
1 bag sugar snap peas, trimmed
1 container strawberries, thinly sliced
Your favorite dressing (we ate a sweet basil dressing with this but Italian dressing would be great too!)

Directions:
A couple hours before you make the salad, take out mozzarella and chop into small pieces.  Put in small bowl.  Chop 1-2 TBS of basil and mix in bowl with cheese.  Make Italian dressing according to package- except when it calls for red wine vinegar, use balsamic vinegar instead.  Pour over mozzarella and basil.  Mix to combine and refrigerate until ready to serve so the dressing marinates the cheese.


When ready to serve salad, rinse Spring salad mix and romaine leaves.  Pat dry and put in large serving bowl.


Wash and cut veggies and fruit according to instructions above.


Add to salad as show in first picture.

When ready to serve, take out bowl of mozzarella marinating in dressing and put along side the salad, so people can plop a few (or a lot) of pieces on top of their salads.  Pour over your favorite dressing and wah-lah!  The perfect salad! Now go turn on ABC and watch the battle for the rose begin!


Thursday, May 17, 2012

Caprese Bruschetta

Who doesn't love a Caprese salad?  You know, with juicy tomatoes, fresh basil, soft mozzarella, and tangy balsamic vinegar.  Well I know that I LOVE LOVE LOVE it but I also love bread and bruschetta.  Of course, whenever I cook an Italian meal, I always want all three of those delicious appetizers before the main meal.  The only problem is, I would stuff my face with all of the addicting apps before me and end up becoming way too full before the main dish even came out of the oven.  I really wanted to fix this problem and somehow get all of the fresh appetizers in one bite without getting too full before my pasta came out of the over.. and then one day, it came to me.

Caprese Bruschetta.

Caprese salad. Bread. Bruschetta.  I get all three in one small bite... brilliant.

This bruschetta is honestly one of the best.  Even my little brother who hates, and I mean HATES, tomatoes eats this bruschetta by the dozen.  He once told me it beat out all restaurant bruschetta- and I must say, I have to agree.  I promise the second you bite into this little toast of delicousness, you will be making sure it is on your menu every time you cook an Italian meal.

So go be amazed and whip up some of this stuff. GOOD stuff. You will be amazed... and addicted. :)  Oh, and one more thing- make sure you make this earlier in the day, before you want to serve it.  The tomatoes need to sit in the vinegar in order for it to be delish! You can even make it the evening before!


Ingredients:
10 plum tomatoes, seeded and diced
1/3 cup chopped basil
Balsamic vinegar, to coat tomatoes
1/2 tsp kosher salt
1/8 tsp freshly ground pepper
1 French baguette (I usually get the take n' bake kind)
1 ball fresh mozzarella
3 garlic cloves, minced
1/4 cup extra virgin olive oil

Directions: 
Chop tomatoes in half and scoop out seeds with a spoon.  Throw away seeds.


Chop tomatoes, depending on how chunky you want your bruschetta, and place in large bowl.


Chop fresh basil leaves and add to bowl.


Mix together.  Sprinkle in salt and pepper and combine.  Pour balsamic vinegar over the tomatoes, making sure the majority of the tomatoes are submerged in vinegar.  Stir.


Cover and refrigerate until ready to serve.

When ready to serve, take out French baguette.  Bake accordingly to package if you bought the take n' bake kind.  Slice bread into thin slices.


Lay out bread slices on a cookie sheet.  In a small bowl, add extra virgin olive oil and chopped garlic.  Microwave for one minute.


Brush garlic infused EVOO on bread, make sure you get pieces of garlic on each slice of bread!


Thinly slice mozzarella cheese, you probably won't use the whole ball- but feel free to :)


Place mozzarella cheese evenly on top of olive oil-brushed slices of bread.


Place cookie sheet in oven and turn broiler on High.  Watch carefully and let cheese melt and the bread toast. (It is okay if the bread slightly burns! You want this cheese melted!)


Take toasts out and set aside.  Take tomato mixture out of refrigerator and stir.  Take a warm toast and top with as much tomato mixture as you'd like!  (The vinegar can make the toast soggy so sometimes I pile up the tomatoes on the side of the toast and then pile on as I eat!  Do NOT drain the tomatoes from the vinegar when you are ready to serve, believe me, you want that delicious vinegar, use the bread to sop it all up!)