Saturday, January 26, 2013

Corn Salsa

Not only is this the yummiest salsa ever but it is soooo easy to make,  my dog could probably do it.

The freshest ingredients, alllll mixed together in one big bowl, and then tossed in a zesty lime dressing.

Who wouldn't want to dip a chip in that?!

It is full of gorgeous colors and flavors that will burst in your mouth the minute you take a bite. 

So, whether you throw it on your table for your big Superbowl party, or just make it for yourself as an afternoon snack, I promise it will be a hit with whoever you serve it to!


Ingredients:
2 cups frozen corn, thawed
3/4 can reduced sodium black beans, drained and rinsed
1 red bell pepper, chopped
1 small or 1/2 medium red onion, minced
1-2 avocados, chopped
2 limes, juice
2 tsp cumin
1 tsp hot sauce
1/4 tsp kosher salt
1/8 tsp freshly ground pepper

Directions:
In a large bowl combine corn, black beans, red pepper, red onion, and avocados.


Squeeze lime juice into a small bowl.  Add cumin, hot sauce, salt, and pepper to the lime juice.


 Pour over the corn mixture and combine.  Refrigerate until ready to serve.  Dip a chip in it and ENJOY!


Sunday, January 20, 2013

Double Chocolate Almond Banana Muffins

So this morning I woke up and decided I wanted to bake banana muffins.

But the only problem is I am so sick of the 'same old-same old' banana muffins.  

You know, the banana bread with (maybe) some chocolate chips and pecans thrown into the mix.

Yeah, definitely wasn't feeling that this morning...

So what was I supposed to do in this sort of predicament?

Well, I did some research and came up with a delicious muffin that, I guarantee, will please you all...

Double Chocolate Almond Banana Muffins.

Chocolate banana bread with lots & lots of toasted almonds and milk chocolate chips.

Uhh yeah. Definitely not your average banana muffin... 

Its a banana muffin hyped up on chocolatey almond goodness... and you are going to love it.

I got this awesome banana chocolate muffin recipe from a great blog called Life Made Simple .  They got the recipe from Good Life Eats but adjusted it to their liking, just as I adjusted it to mine! :) 

Enjoy!


Ingredients:
1/3 cup raw almonds, toasted and chopped 
1 cup & 2 1/2 TBS all-purpose flour
1/3 cup cocoa powder
1/3 granulated sugar
1/4 tsp salt
1 tsp baking soda
1 tsp baking powder
a sprinkle of Cinnamon
1 banana, mashed
1/3 cup greek non-fat plain yogurt
4 TBS applesauce
1 egg
1/2 tsp vanilla
1/4 cup milk chocolate chips

Directions:
Preheat oven to 375 degrees F. 

 Place almonds onto a cookie sheet and bake for 5-8 minutes until toasted.  Set aside and cool.  Chop.  (I chopped some of the almonds into thin slices to top at the end!  This is optional.) 


 In a small bowl, combine the flour, cocoa powder, granulated sugar, salt, baking soda, baking powder, and cinnamon.


In a large bowl add the mashed banana, yogurt, applesauce, and egg. Whisk together just until combined.


Slowly add the dry into the wet ingredients, while whisking slowly.  Batter will get thick but keep mixing.  Only mix until all of the ingredients are combined.


 Fold in cooled chopped almonds and milk chocolate chips.


Line a muffin tray with cupcake liners and spray with non-stick baking spray.  Using a large scoop, evenly scoop batter and release in each cupcake liner.  The batter only allowed me to make 9 cupcakes.    
**This is when I used the slices of almonds and topped a few cupcakes with little flowers!** 


Bake for 20 minutes until they come out clean when stuck with a toothpick!  Enjoy! :)


Friday, January 18, 2013

Chocolate Fudge Brownies with Nutella Buttercream

Chocolate and Nutella...

Probably one of the most glorious combinations in the whole world of delicious-y goodness.. and I just made it even better...

Chocolae fudge brownies + Nutella buttercream.

One word:  Perfection.

A rich, hazelnut-y, chocolate-y spread (yes, those are words) folded into a fluffy buttercream, smeared all over a velvety, chewy, perfectly baked fudge brownie and topped with freshly toasted hazelnuts...  

If that is not heaven, I don't know what is...


Ingredients:
1 box your favorite boxed brownie mix (make accordingly to package)
1/2 cup milk chocolate chips
1 small bag chopped hazelnuts, toasted
1 stick salted butter, softened
1/2 cup Nutella
3 cups powdered sugar
3 TBS skim milk
1 tsp vanilla extract


Directions:
Make brownies according to directions on box BUT before you bake them, sprinkle chocolate chips all over top of batter.  Bake according to the directions on the box.   Let cool.  Preheat your oven to 350 degrees F and spread chopped hazelnuts on a cookie sheet and bake for about 5 minutes until you can smell the hazelnuts.  Set aside and let cool.

Once the brownies are cool, take a circle cookie cutter- your choice on the size- and cut circles out of the brownies.


Set brownies aside.

To make the Nutella buttercream, add softened butter to a bowl.  Mix with a paddle attachment on medium-high until soft.  Add Nutella and mix together on medium speed.  Slowly add powdered sugar and whip on slow-medium speed.  (I poured mine in 1/4 cup at a time!)  Once all of the powdered sugar is added, crank up the speed to medium.  Also, make sure to wipe down the sides of the bowl periodically throughout adding the sugar.  Mix in the milk and vanilla on low speed.  Adjust consistency of buttercream to your liking. (If too runny, add more powdered sugar.  If too thick, add more milk!)

To assemble the brownies: Add one layer of the brownie to a plate.  Top a heaping spoonful of the buttercream on top and spread evenly around the brownie top!


Add another piece of brownie and another scoop of buttercream!  Evenly spread the buttercream around the top of the brownie!  Top with chopped, toasted hazelnuts!  Have some fun and add as many layers of brownie and buttercream as you would like!  Cut out different sized circles and just play around!


Thursday, January 3, 2013

Mexican Baked Tilapia

What better way to kick start the new year with a fresh, healthy dinner full of bright and colorful ingredients and something that gives a huge burst of flavor?!

Luckily, this dinner is just that. 

I love tilapia but it can be soo boring sometimes.  It is oh so healthy for you but without some tasty ingredients to help add some flavor, it can be oh so... blah.

I made sure to include a variety of flavors within this dish, hence the tilapia needed some help.  With the addition of spicy chipotle peppers, sweet corn, zesty lime, and fresh cilantro, this tilapia is brought onto another level.  (I mean, it better be -- it's 2013, people!)

The tilapia is brushed with a spicy marinade, and then placed on top of a gorgeous bed of fresh vegetables.  Wrap it up like a present in tin foil and allow it to bake for a short (or what can be verrry long, if you're impatient like me ;) ) 20 minutes! And wa lah! You have an amazingly tender and flaky piece of fish that has soaked up all of the delicious juices of the marinade and vegetables and leaves a sweet, salty, spicy, mouthwatering scent in your nose, which will trigger your body into something I like to call "devour-mode"...

Just remember to breathe in between bites! ;)

Enjoy!


Ingredients:
2 tilapia fillets, patted dry
Kosher salt
Pepper
1 TBS butter, softened
1/4 tsp lime zest
1 lime, juice
2 chipotle peppers in adobo sauce, seeded and chopped
1 clove garlic, minced

1 cup corn kernels
1/2 16-oz can black beans, rinsed and drained
1/2 small red onion, minced
2 green onions, chopped
1 chipotle pepper in adobo sauce, seeded and chopped
1/2 packed cup cilantro, chopped 
1 clove garlic, minced
1 lime, juice
1/4 tsp Kosher salt 
1/4 tsp Pepper

Aluminum foil 

Directions:
Preheat oven to 450 degrees F.  Pat each tilapia fillet dry with a paper towel. 


Salt and pepper both sides of each tilapia fillet.

In a small bowl add butter, lime zest, lime juice, peppers in adobo sauce and garlic.  Mix together with a fork.


Over a sink, carefully drain the lime juice out of the bowl.  Rub the marinade on each tilapia fillet (only one side of each fillet, not both.)


In a bowl, combine corn, beans, onion, green onion, chipotle pepper, cilantro, garlic, lime juice, salt, and pepper.  Mix together!


Lay out two long pieces of tin foil on your counter.  About a foot to 14-in long each.

Divide the corn and bean mixture evenly onto middle of each piece of aluminum foil.  Top the mixture with the fish-- marinade side up.


Carefully wrap the tinfoil and corn and bean.  I do this by folding in the shorter sides (left and right) first, then rolling the top and bottom in towards the fish to create a little package.  Place on cookie sheet.  


Bake for 15-20 minutes until fish flakes when poked at with fork!!  Chop some fresh cilantro and top fish.  Enjoy!!


Tuesday, January 1, 2013

Oreo Balls

I make these tasty little treats every year for Christmas Eve... and to say that they are a holiday hit is an an understatement.

Everyone loooooves these adorable little bites... and every year they are gone within the first five minutes of placing them on the table.

 I have even witnessed my family and friends fight for the last one on the plate...

But who can blame my Oreo ball fighting friends... I mean who wouldn't love a melt-in-your-mouth, chocolatey, hard shell filled with a creamy Oreo filling?

I know I would.. and I am pretty sure you would too... :)

(Oh, and best part about these delicious, creamy goodies... I use low fat Oreos and light cream cheese -- therefore, you can tell yourself they are healthier than the average cookie... the perfect excuse to eat more than one :) )


Ingredients:
1 package low fat Oreos
1 package 1/3 fat cream cheese
1 bag milk chocolate chips
1 bag white chocolate chips
Sprinkles, for whichever holiday you are celebrating, optional

Directions:
Place 1/3 of the package of whole Oreos into a plastic bag.  Using a mallet, crush the Oreos very finely.  Repeat with the rest of the package.  (I do this in small batches to make sure the Oreos are crushed finely.)


Add the finely crushed Oreos to the bowl of your Kitchenaid with a paddle attachment.  Add the cream cheese, as well.  Mix together on low to medium speed until it blends into a creamy, slightly sticky mixture.  (You can do this in a large bowl with a hand mixer, as well.)


Line a cookie sheet with wax paper.  Take about a tablespoon of the Oreo mixture and roll into small balls.  Place on cookie sheet.


Once you have made as many balls as the mixture allowed place the cookie sheet into the freezer.  

While the balls are freezing, melt one of the bags of chocolate over a double boiler.  (Do this by adding a small amount of water to a small pot and placing over medium heat.  Find a bowl that fits perfectly on top of the small pot.  Make sure the bottom of the bowl is not touching the water.  Add the bag of chocolate chips to the bowl and once the water starts boiling, the steam will begin to melt the chocolate.)


Once the chocolate melts and becomes a velvety consistency, take out the oreo balls from the freezer.  Drop a ball one at a time into the chocolate and using two forks, coat each ball evenly.  Allow the excess chocolate to drip off of the ball and carefully place it back onto the wax paper on the cookie sheet.

Immediately decorate each ball with sprinkles of your choice.  Once you have used all of the chocolate and coated as many Oreo balls as you could, place the cookie sheet back in the freezer. (You will probably coat 1/2 of the balls.)

Repeat with white chocolate chips.  Melt over double broiler and dip balls that still need chocolate.  Decorate immediately withs sprinkles, as well.  Place in freezer.  

Freeze balls until they are completely hard.  Serve when needed.  I usually put mine in cute little festive cupcake holders.  


.


Thursday, December 13, 2012

Cheesy Spinach Stuffed Portobello Mushrooms

It is a dangerous thing when I walk into Whole Foods...

I literally think I could stay in there for hours (or days) and I definitely have a tendency to go in for one thing and leave with a whole cart full of unnecessary (but so very necessary) ingredients, snacks, and treats..

Whoops..

But c'mon you can't blame me.. They have so so sooo many different food items to chose from...

Which brings me to stuffed portobello mushrooms..

I found these little gems in the produce section of Whole Foods, already stuffed and just waiting to be cooked up in my oven.  I immediately brought them home, heated them up, and it was love at first bite.

I never really had eaten a whole portobello mushroom - nor had I ever wanted to -  but who knew when stuffed with super yummy ingredients, such as spinach, peppers, and LOTS of cheese, they would be one of the best side dishes or meals ever to be placed on the table.

I decided to try my own recipe at home and stuff some of my favorite ingredients into the mushrooms and sure enough, it was a great success.

I stuffed TONS of spinach, garlic, onion, and mozzarella cheese -oh, and red pepper flakes for some heat- into the mushroom and because of the excess amount of stuffing, they were absolutely scrumdiddlyuptious.

So whether you get them from Whole Foods, follow my delicious recipe, or make up your own, I promise you will absolutely loooove these.


Ingredients:
2 large or 4 mini portobello mushroom caps
Extra virgin olive oil
1 small yellow onion, chopped
1 box frozen spinach, thawed
3-4 garlic cloves, minced
Red pepper chili flakes
1/2 cup mozzarella cheese

Directions:
Preheat oven to 350 degrees F.  Clean portobello mushroom caps under water and pat dry.


In a large saucepan, add a little drizzle of extra virgin olive oil and heat over medium heat.  Add onion to saucepan and cook until they are translucent, about 7 minutes.  Add spinach, garlic, and red chili flakes and cook for a couple minutes, until all is mixed together and heated through.    


Divide the filling into two servings and stuff the mushrooms.  Pat the filling down into the mushrooms so it gets in every nook and cranny...


Top each mushroom with 1/4 cup mozzarella cheese please.


Place cookie sheet in oven and cook for about 10-15 minutes until mushrooms are cooked through.  Turn your broiler on to high and allow the cheese to melt all over the mushrooms!  Serve immediately and enjoy :)


Tuesday, October 30, 2012

Pumpkin Stew

I loooooove Halloween.  Like a lot.

I think I love it so much because the spooky holiday is just the perfect excuse to decorate my house with cobwebs and witches hats, dress up in absolutely whatever I want, watch scary movies all day and night long, and eat one too many fun-sized Snickers bars... 

Oh, and eat stew out of a pumpkin...

That's right.  Stew.. out of a pumpkin...

Now, don't be afraid... I know you are probably thinking I am crazy. Stew in a pumpkin?! How can that be good? 

But people let me tell you... it is the best stew you will ever taste. 

My mom used to make this dinner for my brother and I every Halloween night before the trick or treating festivities began.  And I mean, kids are food's biggest critics, and if we ate this meal as little ghosts and goblins, it HAS to be absolutely delicious, right?!  

Right.

The familiar flavors of a hearty stew are all present in this new twist on the classic.  The only thing different is the delicious pumpkin flesh that you can peel away from the pumpkin, itself, and eat right along the meat, veggies, and potatoes.  (It tastes JUST like squash so if you like squash this is the best of the best- believe me.) 

This meal is a stick-to-your-rib meal and will keep you up and running all throughout the exciting night of costumes, candy, and whatever mischief you find yourself in..

So Happy Halloween everyone! I hope you have the best night full of love, spooks, and scares with family and friends! (And pumpkin stew, of course...)

Now, excuse me while I go indulge in some right now.. :)

  
Ingredients:
1 12-18 lb. pumpkin
4 large red potatoes, cut into 1-in. pieces
1 medium onion, diced
1 green pepper, 1/2-in. diced
1/2 bag mini carrots, halved lengthwise
Extra virgin olive oil
2 lbs extra lean stew meat
1 cup water
2 tsp salt
1/4 tsp ground pepper
2 TBS instant beef bouillon
1 14 1/2-oz can diced tomatoes, with juice
Vegetable oil

Directions:
Chop potatoes, onion, green pepper, and carrots.


In a large dutch oven or pot, drizzle extra virgin olive oil and add stew meat.


Cook meat over medium-high heat and brown.


Add all of the veggies to the pot.  Mix together.


Add water, salt, and pepper.  Mix together!


Reduce heat to a simmer.  Cover and cook for 2 hours!  Stir the stew throughout the 2 hours.

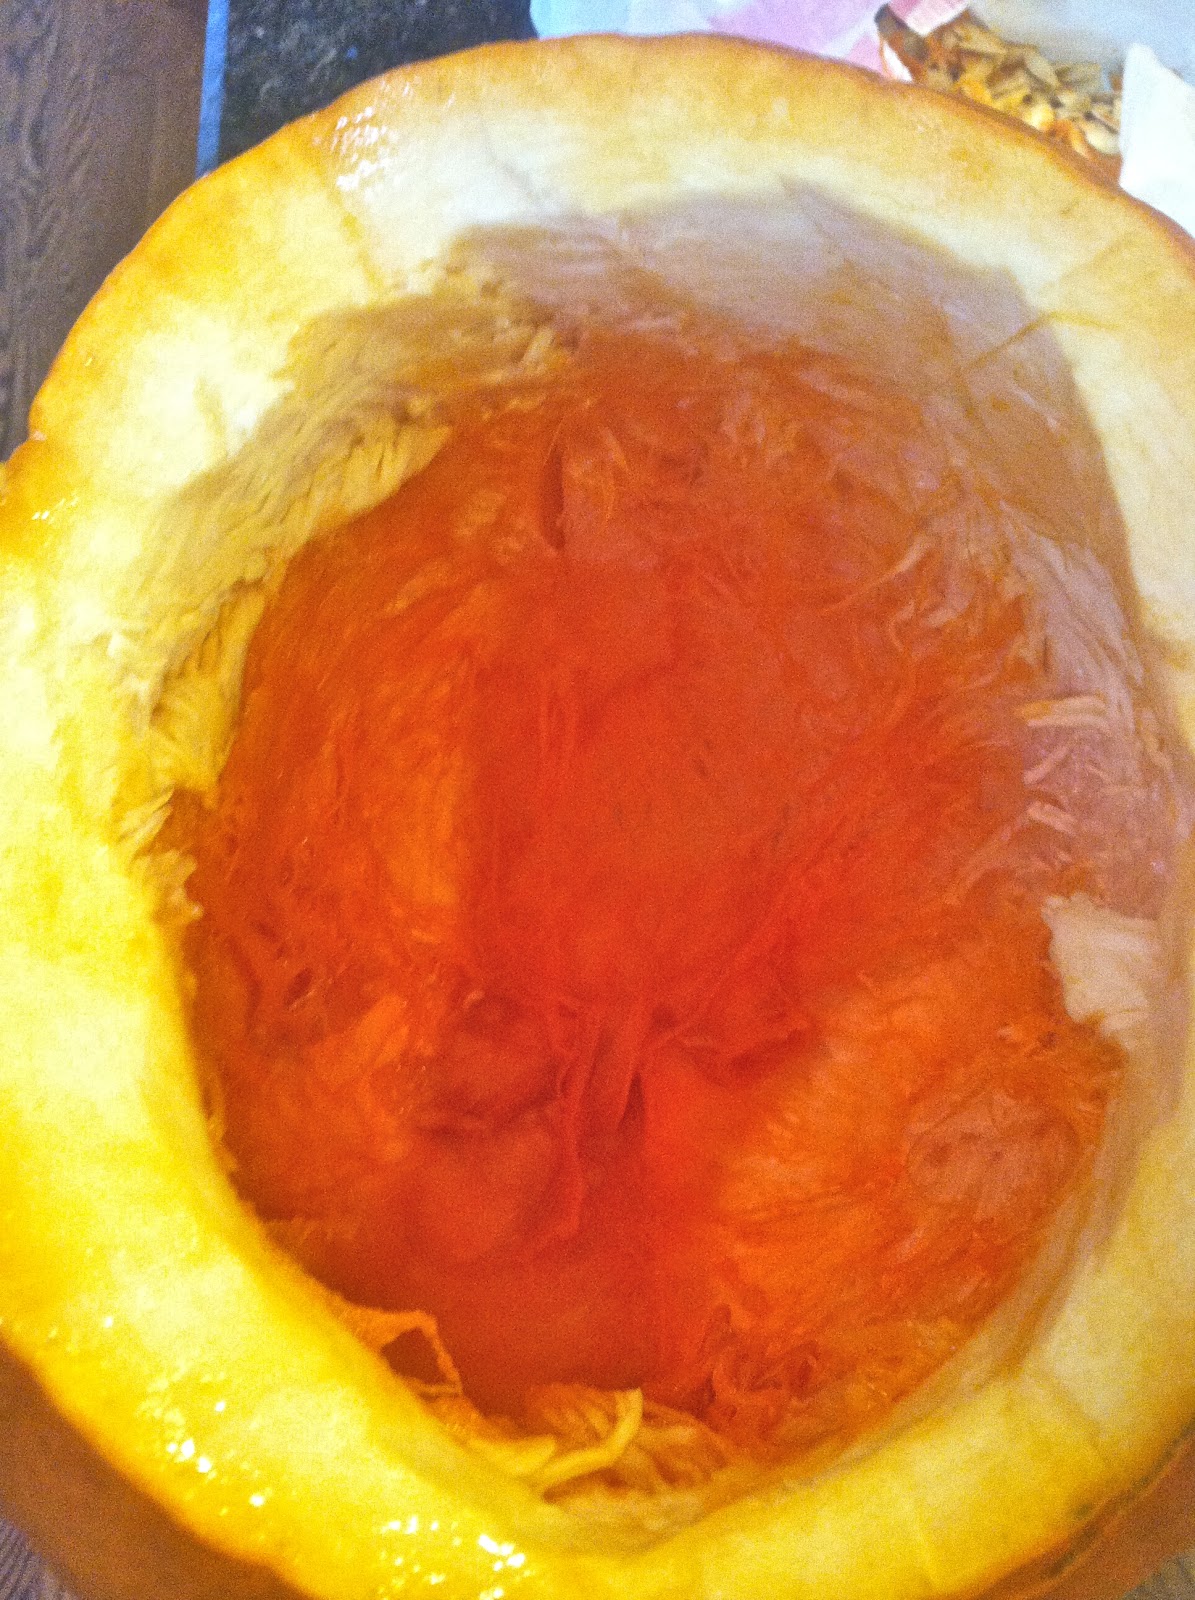
While the stew has cooked for at least 1 1/2 hours,  preheat your oven to 350 degrees F.  You can also start working on your pumpkin!  Cut a 6-8 inch circle around the stem of the pumpkin.  Cut off the excess flesh hanging off of the lid and remove the seeds.  Set aside.  Now, roll up your sleeves and remove all of the seeds from the inside of your pumpkin like you are 5-years old again! Scoop out the stringy pulp, but don't remove all of it!  (You want some of that pulp when you serve yourself a nice, big scoop when it is done cooking!)  Place your pumpkin in a baking dish.   Your pumpkin should looks as mine does, below.


Once your stew has cooked for the full two hours, remove the lid and stir once last time.  Now, I know the stew is not the prettiest (sooo dull in color :( )... but c'mon now stew never is!  And boy, does the taste make up for it..


Spice up the stew mix, and add the beef bouillon and canned tomatoes with juice!


It's pumpkin time! Carefully scoop all of the stew into the pumpkin. 


Once all of the stew has been added, place the lid back on the pumpkin.  Pour a little vegetable oil on to a piece of paper towel and give the outside of your pumpkin a good rub down.  This will keep your pumpkin from burning in the oven.


Add pumpkin to oven and cook for 2 hours!  

Once it has cooked for 2 hours, carefully remove from the oven.


Carefully remove the lid of the pumpkiny cauldron and jump for joy...  are you in for a treat! ( No tricks here, people!)  Remember to scoop out a little pumpkin pulp with each serving! (The pulp on the lid is my favorite part! Tastes just like an acorn squash!) Serve with a hearty piece of bread to dip in the juices and enjoy!! Happy Halloween everyone!